Showing posts with label Stampin' Blends. Show all posts

Wednesday, May 2, 2018

ICS Blog Hop: It's A Guy Thing


Welcome to the May Inspire, Create, & Share Blog Hop! This month, our theme is "It's a Guy Thing." Let's face it. Masculine cards can sometimes be tricky for me to make. I like flowers. I like pink. Well, hey, I like turquoise too - but that's maybe more of a girly blue. Anyways... we were tasked with making a masculine card. And while I freely admit that this might not be the most manly man masculine card... I love it and I'd totally give it to my man - or my boys! They are my knights in shining armor every day :)


For this card, I used the Magical Day stamp set. I loooooooove it, and I am so sad that it's not carrying over into the next catalog! It is just so stinkin' fun to color in with the Stampin' Blends, or Watercolor Pencils, blender pens, or Aquapainters. We just have so many great coloring options right now!! I colored these images with the Stampin' Blends, using Night of Navy, Bermuda Pay, Pool Party, Old Olive, Smoky Slate, Ivory, and Pink Pirouette. And a little light touch of the Color Lifter here and there. I used the coordinating Magical Mates framelits to cut out those images with the Big Shot. I love how they cut them out so perfectly!

Also. That background behind the "Happy Birthday" stamp!! Simply take a piece of plain Whisper White cardstock, and color a gradient using the Blends. Start with the darkest color and color a strip. Then, add the next lightest color and add another strip, blending it with the first. Continue on until you have a gradient you're happy with! I started with the Bermuda Bay dark Blends, moved to the Bermuda Bay light Blends, then Pool Party Dark, then Pool Party Light. Then I cut a circle using the Stitched Shapes Framelits, embossed the Happy Birthday stamp image with white Stampin' Emboss powder, and layered it with a scallop circle in silver foil. And those rhinestones? Simple rhinestones, colored with the dark Bermuda Bay Stampin' Blends marker.


Hope you like it! I love the Blends, and I love any excuse to use them as much as possible. What's your favorite technique with the Stampin' Blends? Leave me a comment to let me know you were here :)

https://bit.ly/2HMVxw3


And then go see the next person on the hop - Shirley Merker. Simply click on the button below, and enjoy the rest of the hop. Thanks for stopping by! If you're interested in any of the products I used on this card, scroll down for the product list. Clicking on any of the items will take you to my online store where you can purchase them, if you're in Canada. If you don't already have a demonstrator, I'd love to be yours! If you're outside of Canada and you're looking for a demonstrator, I can direct you to one of my friends. Enjoy the hop!


Here's what I used on this card:

Monday, December 4, 2017

It's a Magical Day

Hey guys!

So, if you follow me on instagram (artisansanonymous) or facebook (Stampin' Up! with Jenilee Pauls) then you'll know that my awesome husband took me to Mexico last week for my birthday, so I was a little MIA. I did have time to make this little sneak peek card before leaving though, and I wanted to share it with you! It's a mashup of current and upcoming product - and I looooove it. :) It's a combination of some of my favorite colors, and some of my favorite products. I hope you love it too!


That sweet little dragon is from this set called Magical Day, and it is part of a Myths & Magic suite that includes Specialty Designer Series Paper, Washi Tape, Glimmer Paper, and framelits!! So cute. I can't wait to ink up that knight in shining armor for Valentine's Day!

I combined this dragon with a little circle from the Naturally Eclectic Designer Series Paper, and the super simple clouds with embossing paste. The sequins and ribbon add just enough texture. Love it!

ALSO - I used the blends to color these. This is one of the techniques we'll be doing as part of my Blends club - using more than one color duo to bring light and life to your images!

Enjoy!


Here's what I used to make this card - plus the stamp set shown above. Click on any of the images to visit my online store where you can purchase them! Use host code 3XYS6FQ3 at checkout!

Thursday, November 23, 2017

You're Priceless! (no, really - you are!!)

Hi everybody!

This whole month feels like it's been a bit of a whirlwind! I wanted to share with you the card I made for my OnStage swaps, as well as some details around how it was made. I made about 80 of these for OnStage, and had a lot of fun swapping them and giving them away!


First of all, I just love the sentiment in this stamp set. It's perfect to give to someone for a celebration - but it celebrates not just what people have DONE, but what we ARE. We are valuable just in the pure fact that we exist. That is something worth celebrating!! 

I started off making this card by taking the mosaic thinlit from the Eclectic Layers Thinlits and cutting into a piece of Window Sheet that was a little bigger than the size of my card front layer.  I used this as a stencil for embossing paste. Cool, huh? You can make literally any framelit into a stencil!! Once I had the embossing paste on, I removed the stencil and sprinkled it with Dazzling Diamonds Stampin' Glitter. Now - a couple of notes about embossing paste - it dries fairly quick. So don't leave the lid off of it for a super long time, or you'll get crusties inside. Ew. Also, because it dries so fast... if you're making a lot of one project (like I was, when I was making 80 of these!), then you'll want to clean off your stencil periodically. Dried-up embossing paste will accumulate in the corners of your stencil and you won't get a crisp, clear stencil. Nobody wants that. Even if you make only one, you'll want to clean your stencil and your palette knives quickly after using them. It's just easier that way.

Next, I made the Night of Navy scalloped border using the Decorative Ribbon Border Punch. Because I was making so many of them, I'd just do whole strips down the long (11") side of my cardstock, then attach my Naturally Eclectic designer paper strip and trim with snips. That punch, by the way? Genius. Double-sided genius.

OK, the diamonds. I stamped them in Memento Ink, and let them dry. (Ok, not intentionally. I stamped 80 of them. By the time I was done stamping, those first ones had looooots of time to dry!) Then I colored them with our all-new-absolutely-fabulous Stampin' Blends. (Can you tell I love them???) I used the Pool Party light and dark markers, as well as the Color Lifter to blend. Then I got my Big Shot out and got a show going on my ipad because I knew I was going to be there for a while.


It could have been worse. I could have cut both styles of diamonds. Oh wait. I did. In silver foil. This, by the way, is a 2-step framelit. You cut out the center bits, and THEN you cut out the outside diamond shape. You can appreciate, I'm sure, that cutting 80 of these was a labor or love. Or stupidity. Whatever. They're beautiful, right??!


Finally, I cut some 3/4" strips of Lemon Lime Twist, punched the edge with the Banner Triple Punch, and added the sentiment in Old Olive (btw - those colors look good together!) Pop it all together and stick on some rhinestones (because, seriously, can we have a card about gems without rhinestones?! NO!), and you're good to go!


I hope you like the finished product! I was happy with it. Which is a good thing, when you're going to trade your card with OTHER DEMONSTRATORS. I always get so stressed about swap cards... I feel so much pressure to do my best work! If you like my card and want to reproduce it, there's a handy-dandy little list of products I used below. Please also leave me a little comment to let me know you stopped by! It's a really great free way to support my business. A little encouragement goes a long way!

OH. Also, this week, there is a fabulous little thing called the ONLINE EXTRAVAGANZA going on. It's an annual sale on lots of Stampin' Up!'s products. On Monday, there's going to be some doorcrashers! woohoo! But I want to add my own little sale to this, because, hey - it's almost my birthday, and I found out this month that I was the #45 demonstrator in Canada. I don't do any of what I do without the help of my friends - both my team and my customers. You, my friends, really are priceless, and I am so thankful for each and every one of you. SO here's my deal - when you purchase my favorite product, I'm going to give you a little gift! Everyone who purchases the Love Today Planner Kit will get a FREE pack of the Petal Garden Memories & More Cards. These are great - they almost look like they were made to go together - and they're a great way to scrap-plan in your planner. I have my planner all set to go for 2018! I am so looking forward to it being my daily planner. SO. Place your order online using host code 3XYS6FQ3. Put that Petal Garden card pack into your cart (so it will get shipped right away to you!) and I will send you an etransfer refund for the card pack! So simple! 


Again, thanks for stopping by! You're priceless!


Jenilee

Here's what I used to make the You're Brilliant Card:
 

Tuesday, November 14, 2017

Blends Club is starting up NEXT WEEK!

Hi everyone!

It's a super happy day for me because of a few reasons.
1. November is my favorite month.
2. hello?! OnStage!!
3. The STAMPIN BLENDS ARE RELEASED !!


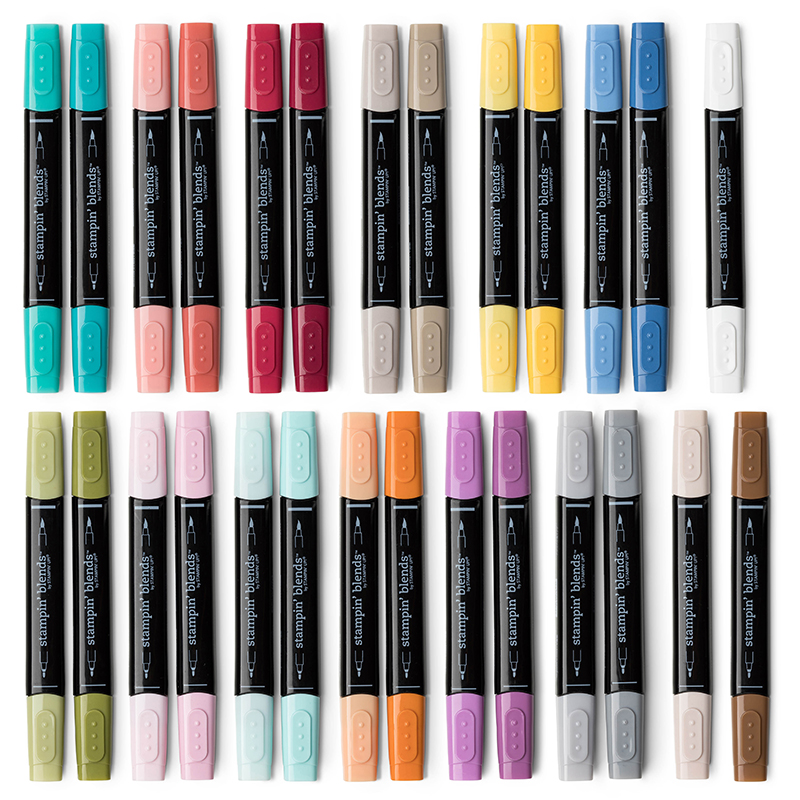
If you haven't been over to my studio to check out these awesome, beautiful, wonderful markers, then I invite you over to do so. You can even come and make some cards with me! OK but back to Blends. These are alcohol blending markers, and they are just simply lovely. SO lovely that I am going to offer a couple of offers for you to get your hands on them! I wanted to offer a club option for those of you that would like to pay for them slowly, but know that with both options, you can choose to pay all of it up front and receive EVERYTHING right away - and then continue to attend all the classes or receive them in the mail. 

BUNDLE 1: THE WHOLE SHEBANG
This bundle includes the Color Me Happy Bundle - the stamp set AND the card kit that makes 16 adorable cards, as well as ALL of the Stampin' Blends. In addition, you'll also get to choose a hostess stamp set!


BUNDLE 2: BLENDS & BASICS
This bundle includes ALL of the Stampin' Blends, as well as some stamping basics: a pack of Whisper White cardstock, a black Memento Stamp Pad (this is the recommended ink for using with Blends), a Memento ink refill, Pearls and Rhinestones (because!! you can color them with the blends and make them whatever color you want!!).


The cost for either of these options is $250 if paid in one lump sum or only $50 per month over 5 months. There are also two options for class times: Tuesday morning or Wednesday evening!

Tuesday mornings, 9-11 am: Nov. 21, Dec. 19. Jan. 16, Feb. 20, Mar. 13.
Wednesday evenings, 7-9 pm: Nov. 22, Dec. 20, Jan. 17, Feb. 21, Mar. 14.

Don't live nearby? NO WORRIES! I can mail you the project supplies and you can complete them at home. 

If this club interests you, please contact me to join! 

In our first month (Nov 21 or 22) we will be making a set of 4 cards from the Color Me Happy project kit. This is FREE for anyone who has purchased the Stampin' Blends,or $15 for those who'd like to drop in and make the cards with us. RSVP by email to earlandjenilee@shaw.ca!

HAPPY NOVEMBER!

Jenilee

Monday, November 13, 2017

An Amazing time at OnStage 2017!

Hi everyone!
Last night, I got home from an amazing time at Stampin' Up! OnStage in Salt Lake City. I probably say this every time... but this trip has been my favorite so far. Not only did we get to look at and order early from the new upcoming Occasions and Sale-a-Bration catalogs (you all have to wait until January!!), we got to learn about the new products and spend time with amazing friends. These events are more and more fun the more times you go, because you get to connect with people from all over the world. And each time you go, you know a few more people and the excitement just grows.

This time, I was fortunate to have a couple of my downline attend with me: Jenn Picard, whose blog A New Ink on Life  is just gorgeous, and Elenore Martens - a friend who has been stamping far longer than I've even been a demonstrator. Both of them were SO fun to hang out with this week! Jen was rooming with her friend Connie Collins - a past and recent Artisan Award winner! You can check out her gorgeous designs at her Constantly Stamping blog. If you're in the US and looking for a place to pick up your favorite Stampin' Up! products, I encourage you to buy through her! She spends a lot of time and energy designing the beautiful projects she makes, and I would like to see her continue to do so for a very long time!! If you're in Canada, you can visit my store and purchase any Stampin' Up! products there!


I was especially excited because, for the first time EVER, I got to walk across the stage for an award. I have a fabulous team (Artisans Anonymous!) and they have been so great this year that I received an award for recruiting. I kinda feel like I can't take too much credit for it because they're the ones who've done the work! But I feel so privileged to be their leader. In addition... I made the ranking boards for Canada this year! #45 in Canada! SO excited, and so thankful for all of you that made that happen for me!


We saw a lot of new products that are up and coming - from the newly released Stampin' Blends alcohol markers to Brusho Pigment Crystals to our soon-to-be-released Stamparatus Stamp Positioning tool!! SO EXCITING! For more information on how to get your name on the reservation list for the Stamparatus, contact me before Nov. 16!! For more information on the Stamparatus, check out the video at the bottom of the post. It really is a pretty phenomenal product - I can't wait to get mine!!!


Ok! This post is getting long so I'm going to let you know more about OnStage in the next couple of posts, but I wanted to remind you all that I have a super fun Blends club happening now! You can sign up anytime, and you can attend the classes if you're local or have them sent to you if you're not. The first class is Nov. 21 from 9 am - 11 am or Nov. 22 from 7 pm to 9 pm. The club is 5 months long and is $50 per month. You'll get all the Blends, your choice of hostess stamp set, and a choice between the Color Me Happy project bundle (kit and stamp set) OR a selection of Blends Basics like cardstock and ink. I am accepting registrations NOW so contact me ASAP if you are interested!


Thanks for stopping by! Visit me again in a day or two and hopefully I'll have some of my swap cards up on the blog!

Jenilee